
I’ve written tons of articles on propagating hydrangeas in the past, and it has genuinely been quite a fun ride. Many have found those articles to be very helpful, while others look for deeper, more comprehensive answers to their hydrangea queries.
This article is perhaps going to be the most detailed and comprehensive guide on hydrangea propagation you’ll find on the internet. So, buckle up and prepare to learn everything!
When Is The Best Time To Propagate Hydrangeas?

Statements like “propagate your hydrangeas during x or y month” are generally too vague for most gardeners, believe me!
It doesn’t take into consideration the particular hydrangea variety or the environmental conditions that person might be working with. As a general guideline:
Keep in mind that the climate zones you’re working in matter, and propagation timings will vary drastically depending on whether you’re in a cooler or warmer zone.
And if you’re as hydrangea-obsessed as I am, here’s a list of fun facts and tips every hydrangea owner should know, you might learn something surprising.
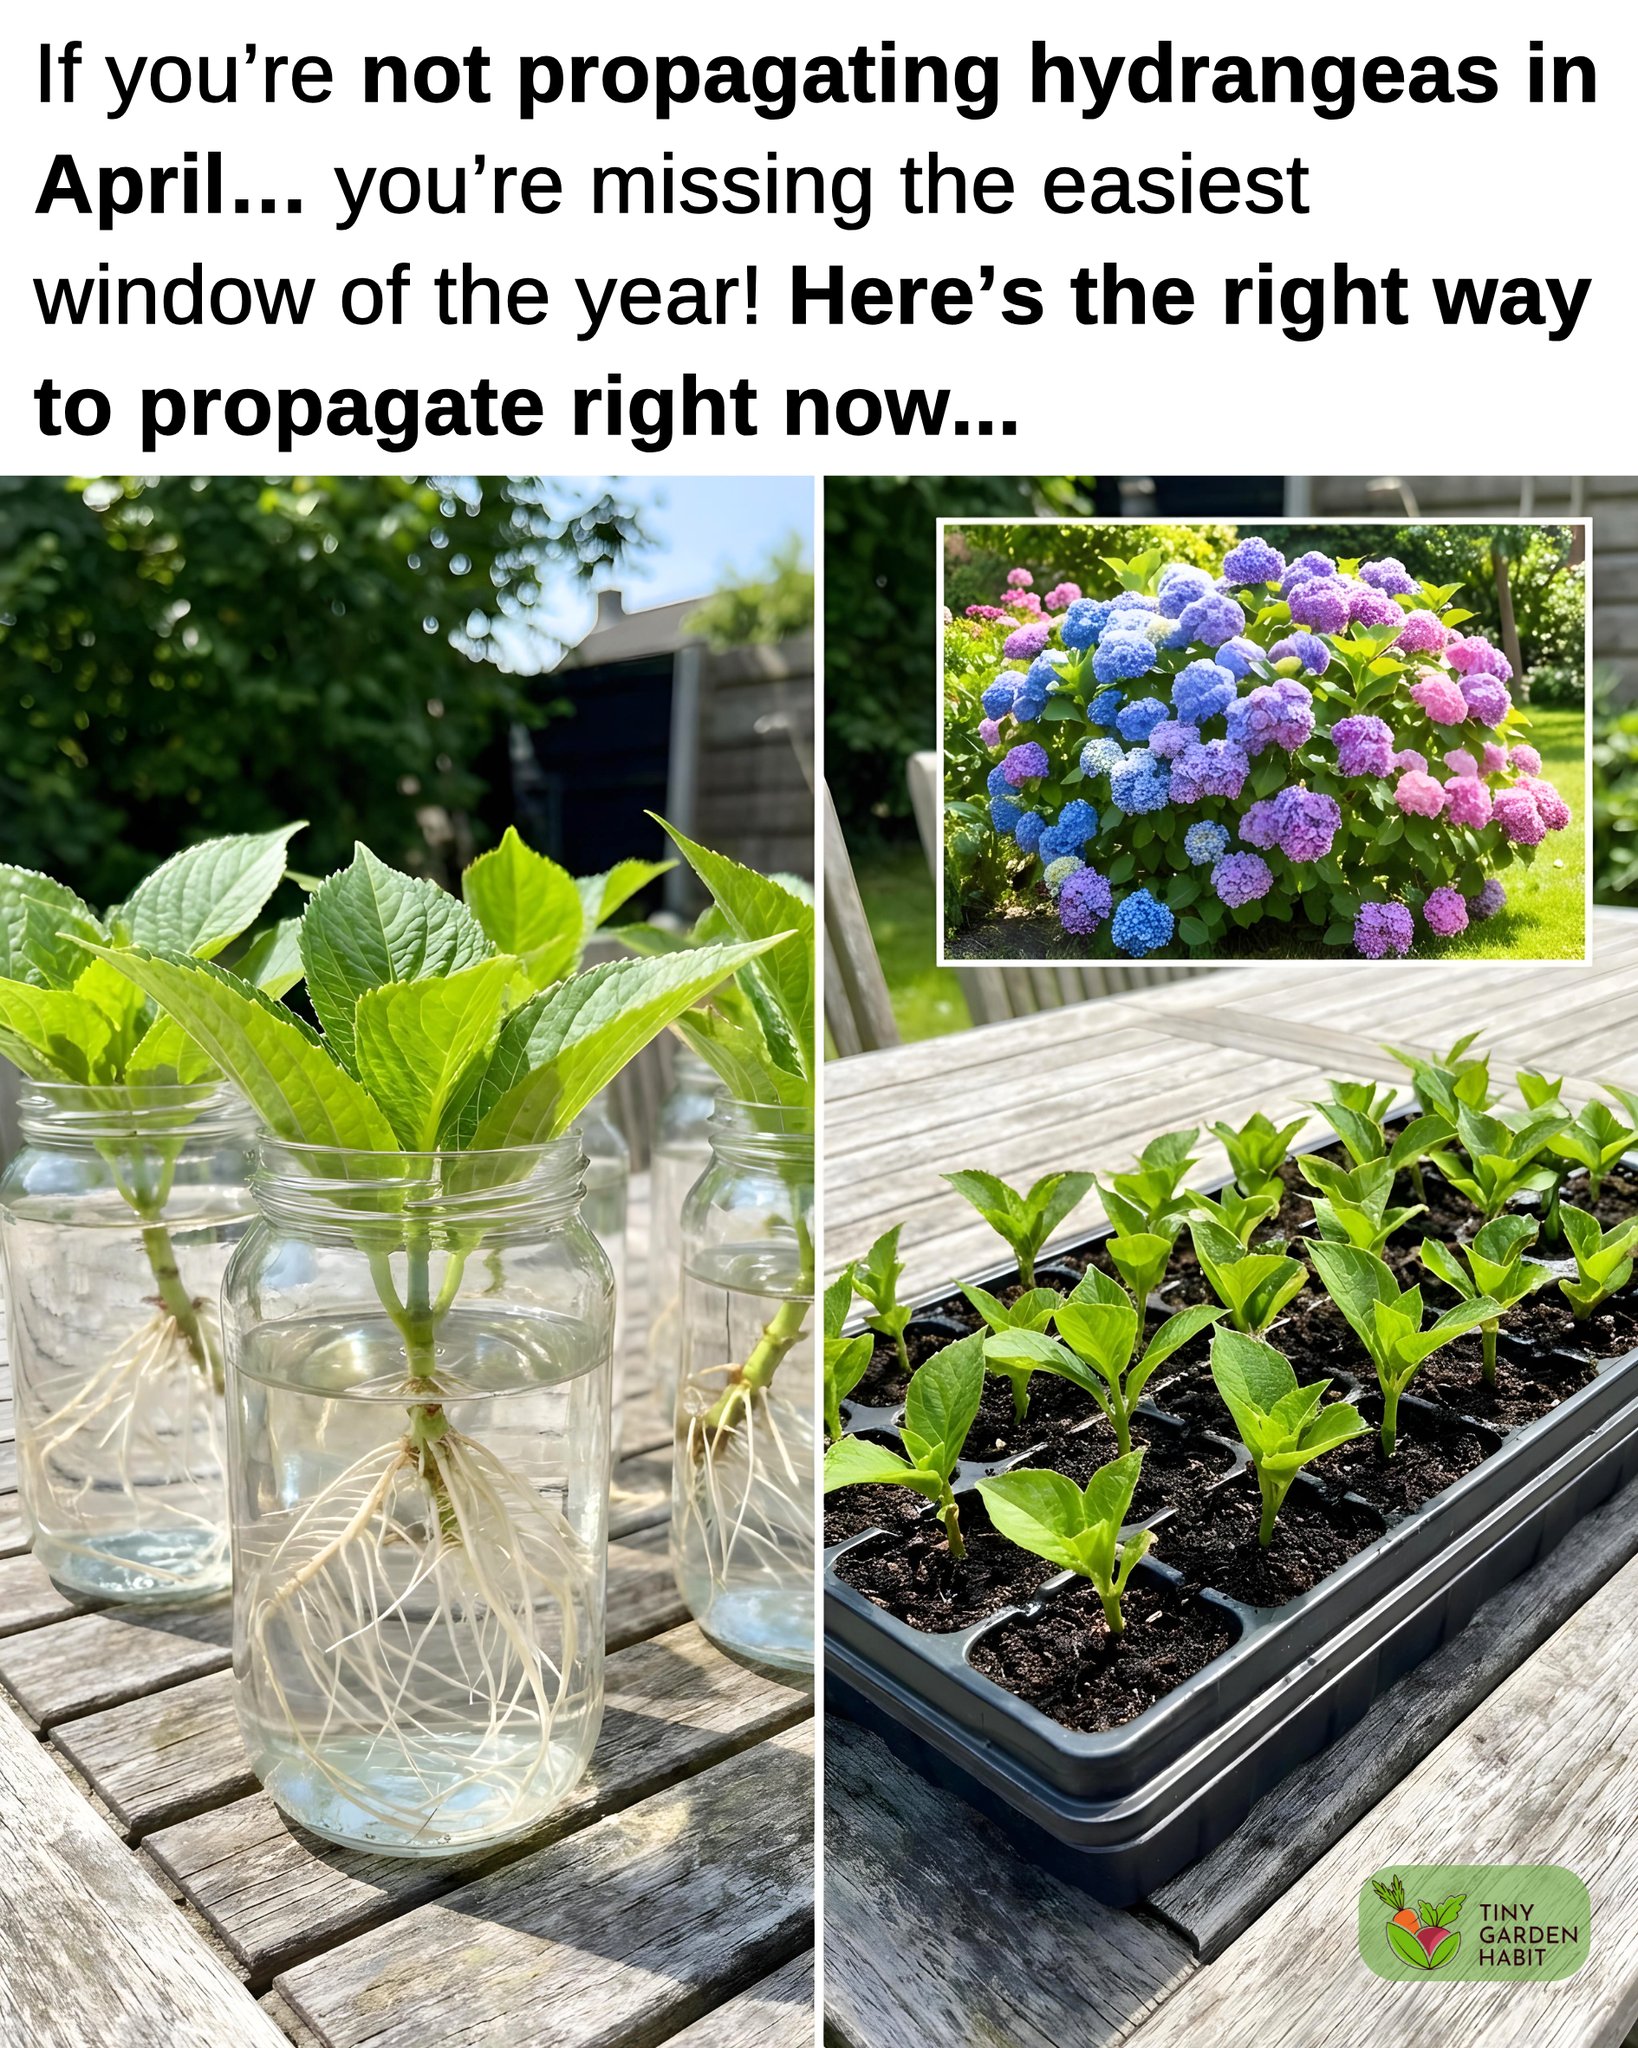
The Two Main Methods – Softwood Vs. Hardwood Cuttings
 100vw, 1254px” /></figure>
<h2 class=) What Are Softwood Cuttings?
What Are Softwood Cuttings?
 100vw, 1024px” /><figcaption class=) Softwood cutting
Softwood cuttingSoftwood cuttings are significantly greener with fresh and flexible growth.
You’ll find that these are not as woody and root more quickly compared to other hardwood types. Despite this, softwood cuttings are still relatively delicate.
Take these anytime between May and July, depending on the climate conditions you’re working with.
What Are Hardwood Cuttings?

Though this may sound counterproductive, hardwood cuttings are best taken in late fall to early winter after the leaves drop. Unlike softwood cuttings, these are much more woody and easy to snap.
Rooting time for hardwood cuttings can be comparatively slow, but definitely much more dependable in the long term.
How To Take Softwood Cuttings (Step-By-Step)

1: Select the right stem

Like with propagating any plant, you want to pick the healthiest-looking parent plant and acquire fresh stem cuttings that have no rot or unwanted fungal spots on them. Try your best to keep the cuttings relatively short and tidy; anywhere between 4-6 inches is ideal.
2: Prepare the cutting

In order to prepare your softwood cuttings, you want to remove all leaves from the lower third of the stem and only leave a few leaf nodes (I also like to cut the tips of the leaves but that’s optional).
If you want faster rooting, I’d suggest dipping your cuttings in rooting hormone, but this is completely optional.
3: Plant and cover
Continued on next page:
